The Origin of Oreo Cheesecake
1.1. The Birth of the Oreo Cookie
It all started in 1912, when Nabisco introduced the legendary Oreo cookie. What began as a simple chocolate sandwich cookie with a creamy filling quickly became an all-time favorite. Over the years, the Oreo evolved—double-stuffed, flavored varieties, and even golden Oreos joined the lineup. Yet, its signature crunch and chocolate-vanilla combo remained unmatched.
1.2. The Fusion of Oreos and Cheesecake
Now, where does cheesecake come in? While cheesecakes date back to Ancient Greece, it wasn’t until the late 20th century that Oreo Cheesecake gained popularity. Home bakers and pastry chefs alike discovered that crushed Oreos made a delicious crust and added delightful texture to the creamy cheesecake filling. Before long, this fusion took over dessert menus worldwide!
Restaurants like The Cheesecake Factory played a major role in popularizing this treat, making Oreo Cheesecake a must-have for dessert lovers. Today, it’s found in bakeries, restaurants, and home kitchens everywhere, proving that this sweet combination is here to stay!

Types of Oreo Cheesecake
Oreo Cheesecake isn’t just a one-size-fits-all dessert. There are countless ways to enjoy this creamy, crunchy delight—whether you prefer it baked, no-bake, mini, or even vegan! Let’s explore the most popular variations.
2.1. Classic Baked Oreo Cheesecake
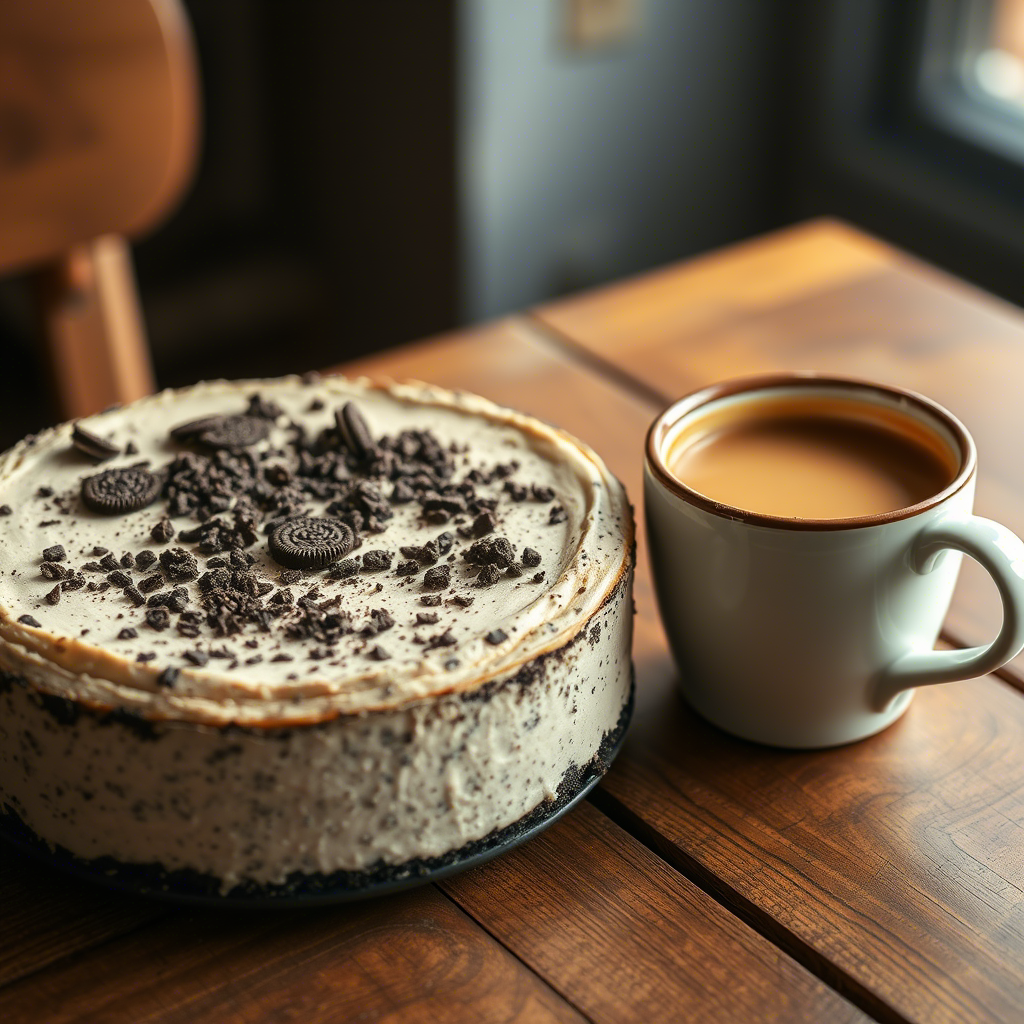
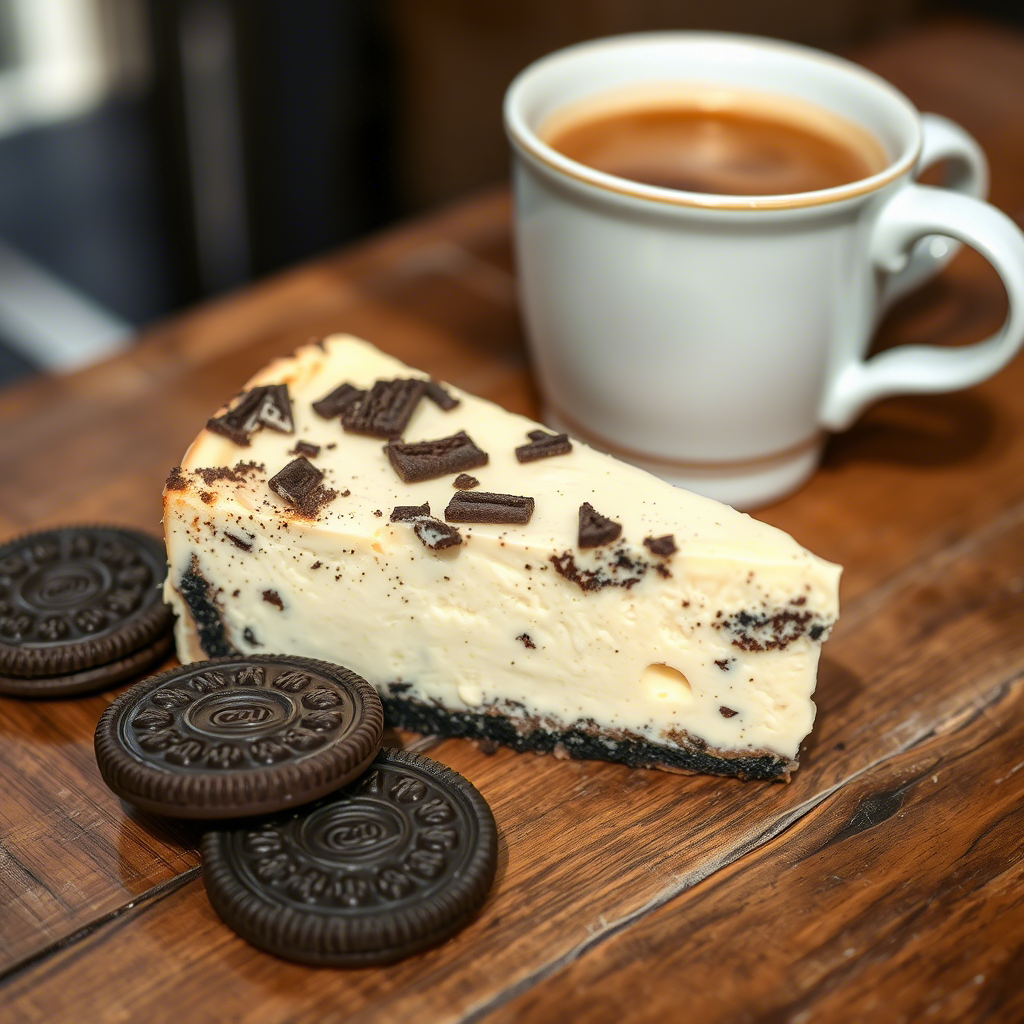
This is the gold standard of Oreo Cheesecake. It has a crispy cookie crust, a rich, velvety filling, and a perfectly smooth top. Baked at a low temperature, this cheesecake sets beautifully, making it ultra-creamy yet firm.
- Why it’s loved: Traditional, rich, and indulgent.
- Best for: Special occasions, celebrations, and when you want a show-stopping dessert.
- Pro tip: Use a water bath to prevent cracks and ensure a silky texture.
2.2. No-Bake Oreo Cheesecake
Don’t want to deal with the oven? No problem! The no-bake version is just as delicious, minus the baking time. Instead of eggs, it relies on whipped cream or gelatin to set.
- Why it’s loved: Quick, easy, and foolproof.
- Best for: Summer desserts, last-minute treats, and when you want a lighter texture.
- Pro tip: Chill for at least 6 hours to help it set perfectly.
2.3. Mini Oreo Cheesecakes
Love portion control? Mini Oreo Cheesecakes are perfect! These individual-sized treats are made in muffin tins or small ramekins. Each bite has the perfect balance of crunchy crust and creamy filling.
- Why it’s loved: Cute, convenient, and great for parties.
- Best for: Dessert tables, birthday parties, and meal prepped treats.
- Pro tip: Place a whole Oreo cookie at the bottom of each cupcake liner for an effortless crust!
2.4. Vegan Oreo Cheesecake
Good news—Oreos are actually vegan! By swapping out dairy ingredients, you can still enjoy this dessert. Common substitutes include:
- Cashew-based or coconut cream fillings.
- Vegan butter for the crust.
- Agar-agar or cornstarch instead of eggs.
- Why it’s loved: Dairy-free, plant-based, and just as creamy.
- Best for: Vegans, lactose-intolerant individuals, and those seeking a healthier alternative.
- Pro tip: Chill overnight for the best texture.
2.5. Gluten-Free Oreo Cheesecake
Even those with gluten sensitivities can enjoy this treat! Swap out the traditional Oreos for gluten-free Oreos, which taste nearly identical to the original.
- Why it’s loved: Safe for those with celiac disease or gluten intolerance.
- Best for: Gluten-free diets, healthier eating, and inclusive dessert options.
- Pro tip: Double-check that all ingredients, including vanilla extract and baking powder, are 100% gluten-free.
Essential Ingredients for the Perfect Oreo Cheesecake
Creating the perfect Oreo Cheesecake starts with the right ingredients. Each component plays a crucial role in achieving that signature creamy, crunchy, and chocolatey delight. Let’s break it down!
3.1. The Crust – A Buttery Oreo Base
A classic Oreo Cheesecake begins with a flavorful cookie crust. Unlike graham cracker crusts, this one is rich, chocolatey, and requires just two ingredients:
- Oreo cookies (with or without the cream filling).
- Melted butter (for binding and richness).
💡 Pro Tip: Crush Oreos finely for a firm crust. A food processor works best, but a zip-top bag and rolling pin will do the trick.
3.2. The Cheesecake Filling – Smooth & Creamy
The heart of any cheesecake is its silky filling. Here’s what you’ll need:
- Cream cheese – Full-fat is best for a rich texture.
- Granulated sugar – Enhances sweetness and balances tanginess.
- Vanilla extract – Adds warmth and depth.
- Eggs (for baked versions) – Provide structure and silkiness.
- Heavy cream or sour cream – Ensures a luscious, smooth consistency.
- Chopped Oreo cookies – For bursts of chocolatey crunch in every bite.
💡 Pro Tip: Always use room temperature ingredients to prevent lumps and achieve a velvety-smooth batter.
3.3. The Topping – Extra Indulgence
To make your cheesecake truly irresistible, finish it off with one of these toppings:
- Whipped cream – Light and airy, balancing the richness.
- Crushed Oreo crumbs – Adds texture and extra flavor.
- Chocolate ganache – A decadent layer of melted chocolate and cream.
- Drizzle of caramel sauce – For a sweet, salty contrast.
💡 Pro Tip: Refrigerate the cheesecake for at least 4-6 hours before adding toppings to ensure a firm set.
3.4. Optional Ingredients for a Unique Twist
Want to experiment with flavors? Try these:
- Peanut butter – Swirl it into the batter for a nutty contrast.
- Espresso powder – Enhances the chocolate notes.
- Mint extract – Creates a refreshing chocolate-mint flavor.
- White chocolate chips – Sweetens the filling with a creamy texture.
💡 Pro Tip: Don’t overload with mix-ins—too much can affect the structure and texture of your cheesecake.
Step-by-Step Instructions to Make the Best Oreo Cheesecake
Now that we’ve got all our ingredients ready, it’s time to put everything together and create the ultimate Oreo Cheesecake! Follow this foolproof method for a rich, creamy, and utterly indulgent dessert.
4.1. Preparing the Oreo Crust
A solid crust sets the foundation for a perfect cheesecake. Here’s how to make it:
- Crush the Oreos – Place about 24-30 Oreo cookies in a food processor and blend until you get fine crumbs. If doing it manually, seal them in a zip-top bag and crush with a rolling pin.
- Mix with melted butter – Combine the Oreo crumbs with 5 tablespoons of melted butter until well incorporated.
- Press into the pan – Firmly press the mixture into the bottom of a 9-inch springform pan using a spoon or the bottom of a glass.
- Chill or bake the crust – For a no-bake version, refrigerate for at least 30 minutes. If baking, preheat the oven to 325°F (163°C) and bake for 10 minutes. Let it cool while you prepare the filling.
💡 Pro Tip: Baking the crust helps prevent it from becoming soggy once the filling is added.
4.2. Making the Creamy Oreo Cheesecake Filling
- Beat the cream cheese – In a large bowl, beat 24 oz (3 blocks) of full-fat cream cheese until smooth and fluffy. Avoid overbeating, as it can introduce too much air.
- Add sugar & vanilla – Mix in 1 cup of granulated sugar and 2 teaspoons of vanilla extract until fully combined.
- Incorporate eggs one at a time – Add 3 large eggs, mixing on low speed after each one. This prevents excess air bubbles, which can lead to cracks.
- Blend in the sour cream & crushed Oreos – Gently mix in ½ cup of sour cream (or heavy cream) and 1 cup of chopped Oreos for added texture.
💡 Pro Tip: Scrape down the sides of the bowl to ensure a lump-free batter.
4.3. Baking the Cheesecake (For Baked Version)
- Pour the filling over the crust – Smooth the top with a spatula.
- Use a water bath (optional) – Wrap the pan with foil and place it in a roasting pan with 1 inch of hot water to ensure even baking.
- Bake at 325°F (163°C) for 50-60 minutes – The center should be slightly jiggly but not runny.
- Cool gradually – Turn off the oven and leave the cheesecake inside for 30 minutes with the door slightly open. Then, let it cool completely at room temperature before refrigerating for at least 4-6 hours (preferably overnight).
💡 Pro Tip: A slow cooling process prevents cracks from forming on top.
4.4. Preparing a No-Bake Oreo Cheesecake
For a no-bake version, follow these simple steps:
- Whip the cream cheese, sugar, and vanilla together until smooth.
- Fold in whipped cream and crushed Oreos until well combined.
- Spread over the chilled crust and refrigerate for at least 6 hours (preferably overnight) to set.