
The Origin of Chocolate Raspberry Drip Cake
1.1 The History of Drip Cakes
Drip cakes have taken the baking world by storm, but they’re not just a modern Instagram trend. This visually stunning style dates back decades, originally inspired by French pâtisserie techniques. The dripping effect gained momentum in professional bakeries before taking over home kitchens.
But why the chocolate and raspberry combo? Simple—it’s a classic match! The deep cocoa notes of a moist chocolate cake pair beautifully with the tart fresh raspberry filling, creating a flavor contrast that’s both bold and balanced.
1.2 Why This Cake Is So Popular Today
There’s something mesmerizing about a flawless chocolate ganache drip cascading down a frosted cake. But it’s not just about aesthetics—this cake hits all the right notes when it comes to taste, texture, and visual appeal. The combination of sweet, bitter, and tart flavors makes it a favorite for birthdays, weddings, and celebrations.
Moreover, social media platforms like Instagram, Pinterest, and TikTok have propelled this cake to viral fame. With the rise of home baking, many enthusiasts have taken on the challenge of creating their own show-stopping versions.
1.3 The Role of Raspberry in Elevating the Flavor
You might wonder—why raspberries and not another fruit? The answer lies in their natural acidity and vibrant color. The tartness of raspberries cuts through the richness of chocolate, preventing it from becoming overly sweet. Plus, the deep red hue adds a visually striking contrast against a dark chocolate backdrop.
Essential Components of the Perfect Chocolate Raspberry Drip Cake Slice
In Part 2, we will explore the core elements that make up the chocolate raspberry drip cake. Each component plays a pivotal role in achieving that perfect balance of flavor and visual appeal. Whether you’re a seasoned baker or a beginner, understanding these key ingredients will set you up for success!
2.1 The Moist Chocolate Cake Base
At the heart of every great cake is the base—the chocolate cake layer. To create the ideal texture, your cake needs to be moist, fluffy, and dense enough to hold up to layers of filling and frosting. A good recipe will balance baking soda or baking powder with the richness of cocoa powder and buttermilk to create a tender crumb.
Some bakers opt for using dark chocolate or even espresso to amplify the flavor, ensuring that the chocolate truly shines through. Be sure to use a high-quality cocoa powder for a richer taste—Dutch-processed cocoa is often recommended for a smoother, deeper chocolate flavor.
2.2 The Raspberry Filling
Raspberries add that essential burst of tartness that beautifully complements the rich chocolate. To create a smooth raspberry filling, you’ll need to cook the raspberries down into a compote, thickened with a bit of sugar and cornstarch to give it body. The compote should be spreadable, but not so runny that it will seep through the cake layers.
For an extra layer of flavor, some bakers opt to add a dash of lemon juice or vanilla extract, which can help balance the tartness and add depth. And, if you prefer a smoother texture, consider straining the compote to remove the seeds, allowing only the rich, flavorful fruit puree to remain.
2.3 The Silky Chocolate Ganache
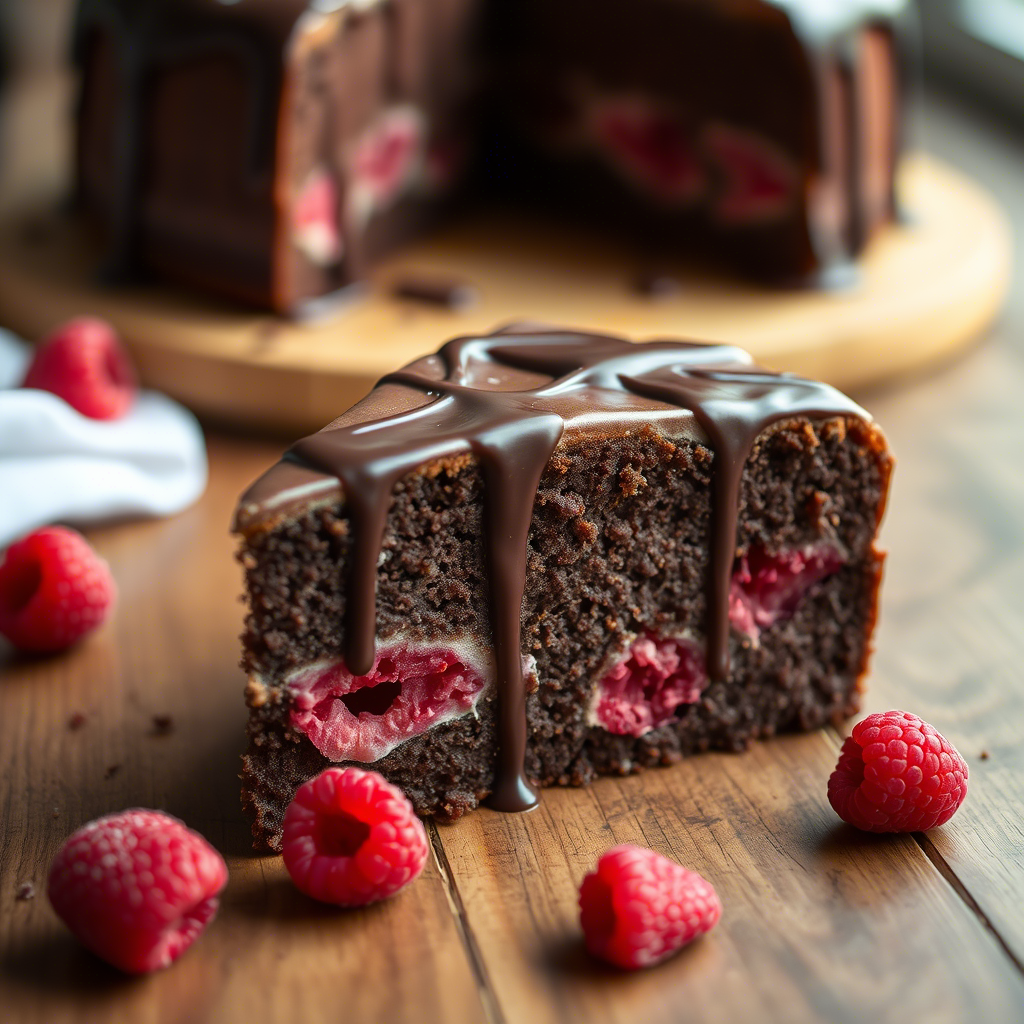
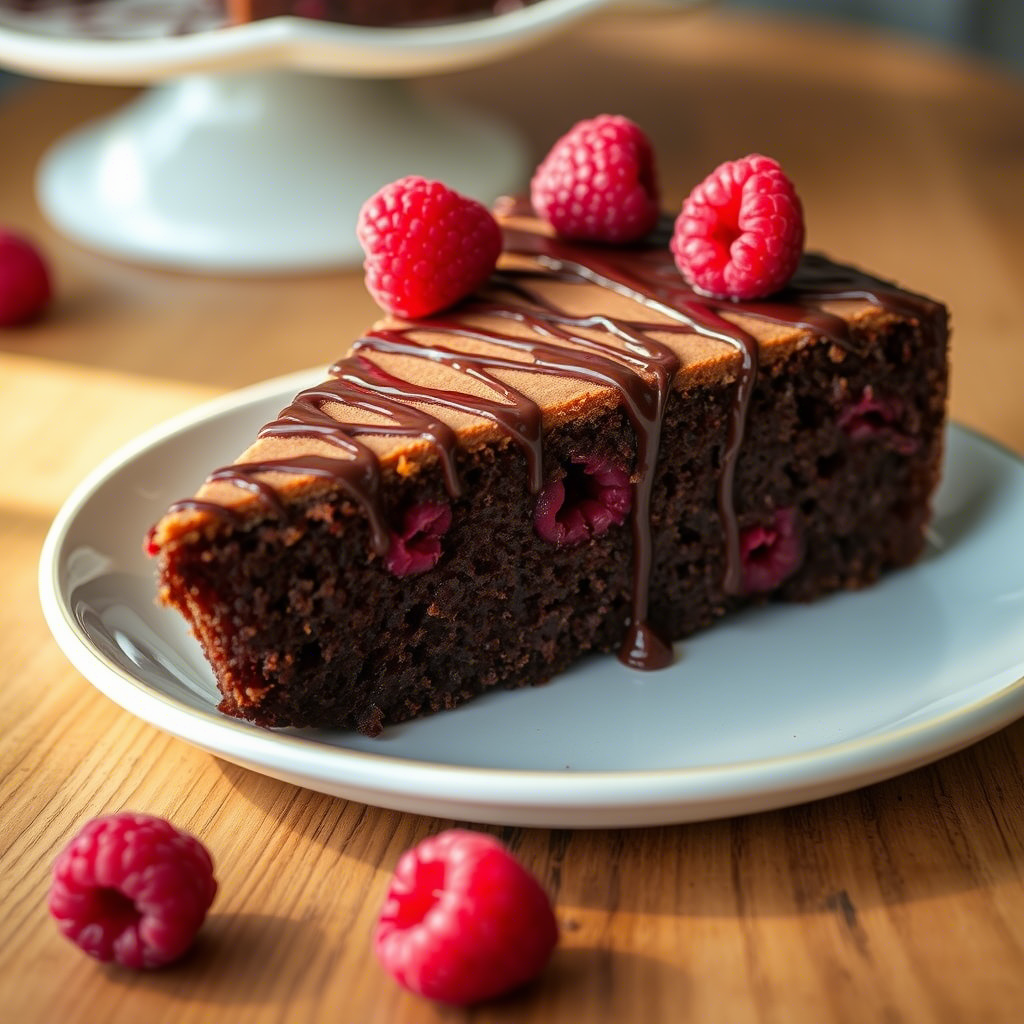
The showstopper of this cake is undoubtedly the chocolate ganache. A perfectly made ganache should be smooth, silky, and glossy, with the ideal balance of chocolate richness and creaminess. To make ganache, heat heavy cream just until boiling, then pour it over chopped chocolate (either milk, dark, or white chocolate, depending on your preference). Stir until smooth, then let it cool slightly to thicken. This cooled ganache is what you’ll pour over the cake, allowing it to drip down the sides and pool at the bottom.
A dark chocolate ganache will provide a rich, intense contrast to the sweetness of the raspberry filling and buttercream, while a milk chocolate ganache brings a creamier, sweeter profile to the cake.
2.4 The Buttercream Frosting
While the ganache steals the spotlight, a soft, buttery frosting holds the layers of cake together and creates a smooth surface for the ganache to drip over. Typically, a vanilla buttercream is used, but some variations include cream cheese frosting for a tangier flavor or even raspberry buttercream to add another layer of fruitiness.
Step-by-Step Guide to Assembling the Chocolate Raspberry Drip Cake Slice
Now that we’ve explored the individual components, it’s time to bring them together to create the ultimate chocolate raspberry drip cake slice. This is where your patience and precision will shine. Follow this step-by-step guide to assemble each layer, ensuring your cake looks as beautiful as it tastes.
3.1 Preparing the Cake Layers
The first step in assembling your cake is ensuring that your chocolate cake layers are baked, cooled, and ready to go.
- Bake the Cake:
Once you’ve prepared your chocolate cake batter, divide it evenly between your cake pans. Bake at the appropriate temperature (usually around 350°F or 175°C), and allow the cake to cool for about 10 minutes before removing it from the pans. This ensures the layers don’t break apart. - Level the Layers:
After cooling, use a serrated knife or a cake leveler to trim any uneven tops, making your layers flat. This will allow for more even stacking, and prevent your layers from tilting or sliding.
3.2 Adding the Raspberry Filling
Now, it’s time to bring in the raspberry compote filling, which will give your cake a burst of fruitiness and moisture.
- Pipe the Raspberry Compote:
Use a piping bag or spoon to evenly spread the raspberry filling over the first layer of cake. Leave a small border around the edge to prevent the filling from spilling out once the next layer is added. - Smooth It Out:
Use an offset spatula to smooth the filling, ensuring it’s evenly distributed and forms a nice, even layer. This will help keep the layers consistent and prevent any uneven bites.
3.3 Frosting with Buttercream
Next up is the buttercream frosting. You’ll use this as a layer between the cake and ganache to help secure everything and provide a silky smooth surface for your chocolate ganache.
- Apply a Thin Layer of Frosting:
Take a generous amount of buttercream and spread it across the top of the raspberry filling, smoothing it out with a spatula. You don’t need a thick layer—just enough to cover the filling and create a nice base for the ganache. - Chill the Cake:
Place the cake in the fridge for about 10-15 minutes. This will help the frosting firm up and make the next steps a lot less messy.
3.4 Dripping the Ganache
The final step in this process is the most visually exciting part—dripping the chocolate ganache.
- Prepare the Ganache:
As mentioned earlier, you need to have your ganache ready—smooth, glossy, and cooled to a thick consistency. - Apply the Ganache:
Pour the ganache over the center of the cake, allowing it to drip over the edges. You can use a spoon to gently encourage the ganache to drip evenly down the sides of the cake. If you prefer a more controlled drip, you can use a squeeze bottle to apply the ganache in small amounts. - Finishing Touches:
Once the ganache is set, you can decorate the top of the cake with fresh raspberries, a dusting of powdered sugar, or even some chocolate shavings for an extra touch of elegance.
Expert Tips for Creating the Perfect Chocolate Raspberry Drip Cake Slice
While assembling the chocolate raspberry drip cake slice is quite straightforward, there are a few expert techniques and tips that can really elevate the look and taste of your cake. These tips will help you avoid common mistakes, improve the texture, and give your cake a professional touch.
4.1 Use Room Temperature Ingredients
A key to achieving smooth, lump-free frosting and ganache is to always use room-temperature ingredients. Cold butter and eggs can cause your batter to seize up and affect the texture of your chocolate raspberry drip cake slice. So, before you begin, take your butter and eggs out of the fridge at least 30 minutes before starting.
4.2 Chill the Cake Layers for Easy Assembly
After baking the cake layers, it’s a good idea to chill them in the fridge or freezer for 15-20 minutes before you start assembling. Chilled cake layers are firmer, making them easier to handle and less likely to crumble during the assembly process. This will also help the layers stay neatly stacked and prevent them from leaning.
4.3 Ensure the Ganache is the Right Temperature
The perfect ganache should be smooth, glossy, and drip-worthy. However, its consistency is critical for achieving those beautiful drips down the sides of your cake. If the ganache is too hot, it will pour too quickly, making the drips too thin and running down the sides uncontrollably. If it’s too cold, it will be too thick to drip.
Let the ganache cool to about room temperature before you apply it to the cake. It should be thick enough to hold its shape but fluid enough to drip.
4.4 Decorate with Fresh Fruit for a Burst of Color
Fresh raspberries not only pair perfectly with chocolate but also add a burst of vibrant color to your cake. Scatter them over the top, or place them along the sides to enhance the look of your chocolate raspberry drip cake slice. You can even use raspberry sauce or puree to create an artistic design or drizzle over the top for a gorgeous finish.
4.5 Keep the Cake Refrigerated
Since your chocolate raspberry drip cake slice contains fresh ingredients like buttercream, raspberry filling, and ganache, it’s important to store it in the refrigerator. This will help preserve its freshness and prevent any melting or spoilage. However, make sure to bring the cake to room temperature for about 30 minutes before serving for the best flavor and texture.
FAQs about Chocolate Raspberry Drip Cake Slice
Now that you’ve learned how to make a chocolate raspberry drip cake slice, you might have some lingering questions. We’ve gathered the most frequently asked questions to help guide you through any uncertainties.
5.1 How Can I Make the Cake Gluten-Free?
If you’re looking to make a gluten-free chocolate raspberry drip cake slice, you can substitute all-purpose flour with a gluten-free flour blend. Make sure the blend is suitable for baking to ensure the texture holds up. Additionally, check the chocolate chips and raspberry fillings to ensure they are gluten-free. Many brands offer certified gluten-free options that are perfect for this cake.
5.2 Can I Make the Cake in Advance?
Absolutely! In fact, making your chocolate raspberry drip cake slice a day in advance can actually enhance the flavors. Once the cake is fully assembled, store it in the refrigerator, and it will stay fresh for up to 3 days. Just remember to bring it to room temperature for 30 minutes before serving for the best flavor and texture.
5.3 How Do I Get Perfect Drips?
Perfect drips are all about the right ganache temperature and consistency. If your ganache is too hot, it will run down too quickly and be too thin. If it’s too cold, it won’t drip at all. Aim for a ganache that is just thick enough to hold its shape but fluid enough to gently drip down the cake. The secret is to test it before pouring to get the right look!
5.4 Can I Use Frozen Raspberries Instead of Fresh?
Yes, you can use frozen raspberries in your chocolate raspberry drip cake slice, but keep in mind that they may release more liquid than fresh raspberries. To prevent your cake from becoming soggy, consider draining the frozen raspberries and patting them dry before decorating the cake. Also, frozen raspberries won’t have the same vibrant color as fresh ones, so the visual appeal may be slightly different.
5.5 Can I Add Other Flavors to the Cake?
Definitely! While chocolate and raspberry are a classic combo, you can customize your chocolate raspberry drip cake slice with other flavors. Consider adding orange zest for a citrusy twist, or even incorporate a layer of hazelnut spread for a Nutella-inspired flavor. The possibilities are endless—experiment and find your perfect flavor pairing!