
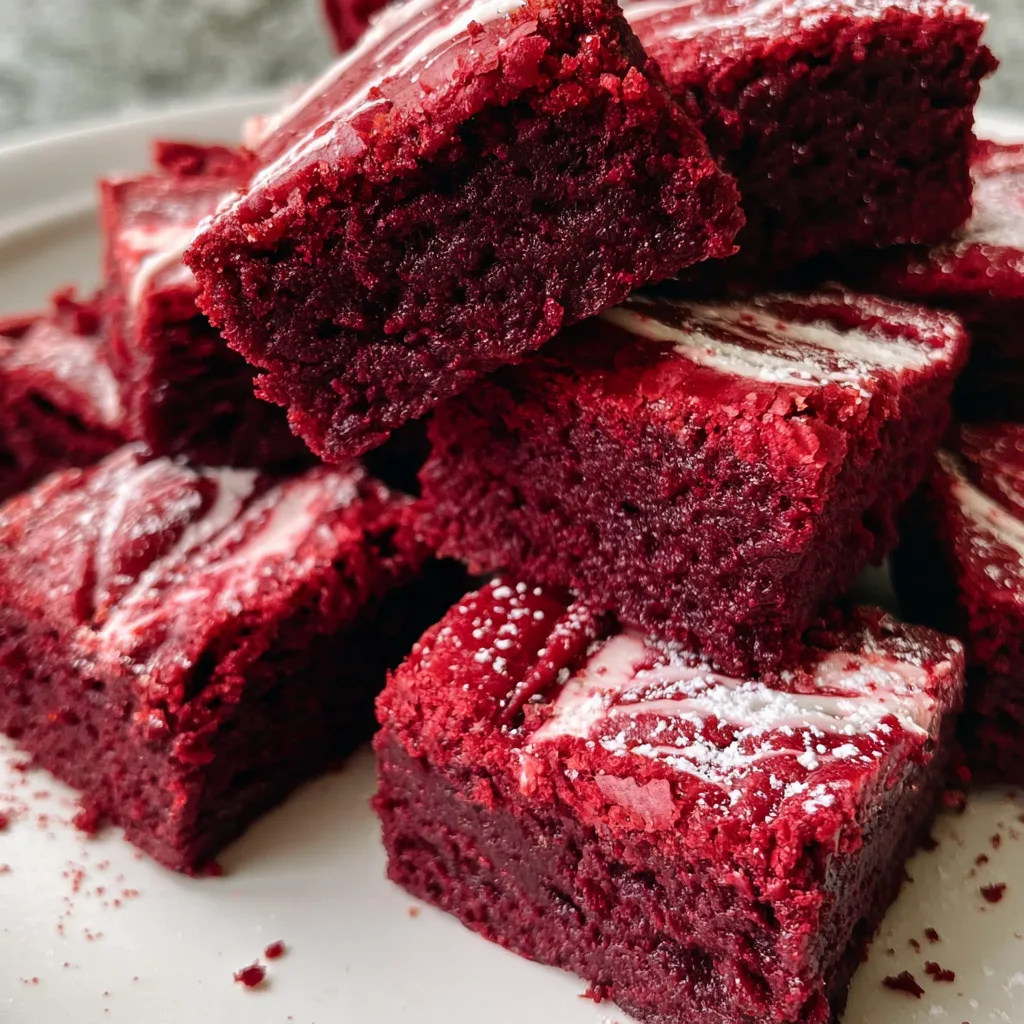
These Fudgy Red Velvet Brownies combine the rich texture of classic chocolate brownies with the beautiful color and subtle cocoa flavor of red velvet cake. Each square has a soft, dense center, slightly crisp edges, and a deep chocolate flavor that makes it hard to stop at just one bite.
PrintFudgy Red Velvet Brownies – Easy Cream Cheese Swirl Dessert

These Fudgy Red Velvet Brownies feature a rich cocoa flavor, soft chewy centers, and a creamy cream cheese swirl. An easy and beautiful homemade dessert!
Ingredients
For the Brownies
- ½ cup unsalted butter
- 1 cup granulated sugar
- 2 large eggs, room temperature
- 1 teaspoon vanilla extract
- 1 tablespoon red food coloring
- 1 teaspoon white vinegar
- ¾ cup all-purpose flour
- ¼ cup unsweetened cocoa powder
- ¼ teaspoon salt
- ½ cup white chocolate chips
For the Cream Cheese Swirl
- 4 ounces cream cheese, softened
- ¼ cup granulated sugar
- 1 large egg yolk
- ½ teaspoon vanilla extract
Instructions
Prepare the Brownie Batter
- Preheat the oven to 350°F (175°C). Line an 8 × 8-inch baking pan with parchment paper, leaving an overhang for easy removal.
- Melt the butter in a microwave-safe bowl or small saucepan.
- Whisk the melted butter and granulated sugar together until smooth.
- Add the eggs one at a time, whisking well after each addition.
- Stir in the vanilla extract, red food coloring, and white vinegar.
- In a separate bowl, whisk together the flour, cocoa powder, and salt.
- Gradually fold the dry ingredients into the wet mixture until just combined.
- Fold in the white chocolate chips.
Make the Cream Cheese Swirl
- In a small bowl, beat the softened cream cheese and sugar until smooth and creamy.
- Add the egg yolk and vanilla extract.
- Mix until fully combined and silky.
Assemble the Brownies
- Spread the red velvet brownie batter evenly into the prepared baking pan.
- Spoon small dollops of the cream cheese mixture over the surface.
- Use a toothpick or knife to gently swirl the cream cheese into the brownie batter, creating a marbled pattern.
Bake
- Bake for 25–30 minutes, until the edges are set and a toothpick inserted near the center comes out with a few moist crumbs.
- Avoid overbaking to keep the brownies fudgy.
- Remove from the oven and let cool completely in the pan.
Slice and Serve
- Refrigerate the cooled brownies for 30–45 minutes for cleaner slices.
- Lift them out using the parchment paper and cut into squares with a sharp knife.
- Serve at room temperature or slightly chilled.
What makes these brownies special is their texture. Melted butter and chocolate create a rich base, while a little cocoa powder adds the familiar chocolate taste associated with red velvet desserts. A touch of vanilla and a hint of tanginess help balance the sweetness, giving these brownies their distinctive flavor.
They’re also easy to prepare with simple baking ingredients and don’t require complicated decorating. You can enjoy them plain, add white chocolate chips for extra sweetness, or finish them with a smooth cream cheese swirl for a classic red velvet-inspired touch.
Fudgy Red Velvet Brownies are perfect for Valentine’s Day, Christmas dessert tables, birthday celebrations, potlucks, or whenever you’re craving something chocolatey and homemade. Cut them into small squares, arrange them on a serving platter, and enjoy a colorful dessert with a rich, satisfying brownie texture.
Ingredients
Fudgy Red Velvet Brownies
Yield: 16 brownies · Prep Time: 15 minutes · Bake Time: 25–30 minutes
Ingredients
For the Brownies
-
½ cup unsalted butter
-
4 ounces white chocolate, chopped
-
1 cup granulated sugar
-
2 large eggs, room temperature
-
1 teaspoon vanilla extract
-
1 tablespoon red food coloring
-
1 teaspoon white vinegar
-
¾ cup all-purpose flour
-
2 tablespoons unsweetened cocoa powder
-
¼ teaspoon salt
Optional Cream Cheese Swirl
-
4 ounces cream cheese, softened
-
2 tablespoons granulated sugar
-
½ teaspoon vanilla extract
-
1 tablespoon milk
Ingredient Notes
-
Butter: Adds richness and helps create the dense, fudgy brownie texture.
-
White chocolate: Gives the brownies a smooth, rich base while allowing the red velvet color to stand out.
-
Cocoa powder: Use unsweetened cocoa powder for a mild chocolate flavor without making the brownies taste like traditional chocolate brownies.
-
Red food coloring: Gives the brownies their signature vibrant red appearance. Gel coloring works well because it provides strong color without adding much liquid.
-
White vinegar: A small amount adds the subtle tang commonly associated with red velvet desserts.
-
Cream cheese: Creates a delicious cheesecake-style swirl that pairs beautifully with the cocoa flavor.

How to Make Fudgy Red Velvet Brownies
Prepare the Baking Pan
Preheat your oven to 350°F (175°C). Line an 8 × 8-inch baking pan with parchment paper, leaving a little overhang on the sides for easy removal.
Melt the Butter and White Chocolate
In a microwave-safe bowl, combine the butter and chopped white chocolate. Heat in 20-second intervals, stirring between each one, until completely melted and smooth. Set aside for a few minutes to cool slightly.
Mix the Wet Ingredients
In a large mixing bowl, whisk together the granulated sugar and eggs until smooth. Add the vanilla extract, red food coloring, and white vinegar. Stir until the mixture has an even red color.
Combine the Brownie Batter
Slowly pour the melted butter and white chocolate mixture into the egg mixture, stirring until combined. Add the flour, cocoa powder, and salt. Fold gently with a spatula until no dry streaks remain. Avoid overmixing to keep the brownies tender and fudgy.
Prepare the Cream Cheese Swirl
In a separate bowl, beat the softened cream cheese with the sugar, vanilla extract, and milk until smooth and creamy. The mixture should be thick but easy to spread.
Assemble the Brownies
Pour the red velvet brownie batter into the prepared baking pan and spread it evenly. Spoon small portions of the cream cheese mixture over the surface. Use a toothpick or knife to gently swirl the two mixtures together, creating a decorative pattern.
Bake Until Set
Bake for 25–30 minutes, or until the edges are set and a toothpick inserted near the center comes out with a few moist crumbs. Avoid waiting until the toothpick is completely clean, as that can mean the brownies are overbaked.
Cool Completely
Remove the pan from the oven and let the brownies cool in the pan. For cleaner slices, refrigerate them for about 30 minutes after they reach room temperature.
Slice and Serve
Lift the brownies out using the parchment paper and cut into 16 squares with a sharp knife. Wipe the knife between cuts for neat edges, then serve and enjoy.
Serving, Storage, Variations, and FAQs
Serving Suggestions
Serve Fudgy Red Velvet Brownies at room temperature or slightly chilled for a rich, dense texture. Their red color and creamy white swirl make them especially attractive on Valentine’s Day dessert platters, Christmas trays, and birthday tables.
For an extra indulgent dessert, serve a warm brownie with a scoop of vanilla ice cream and a drizzle of melted white chocolate. You can also add fresh strawberries or raspberries for a fruity contrast.
Storage Tips
-
Refrigerator: Store brownies with the cream cheese swirl in an airtight container for up to 5 days.
-
Freezer: Wrap individual brownies tightly and freeze for up to 2 months. Thaw overnight in the refrigerator before serving.
-
Room Temperature: Because these brownies contain a cream cheese topping, don’t leave them at room temperature for more than 2 hours.
-
Make Ahead: Bake them a day in advance and refrigerate. Their texture becomes even firmer and easier to slice after chilling.
Variations
-
White Chocolate Chip Brownies: Fold ½ cup white chocolate chips into the batter before baking.
-
Classic Red Velvet Brownies: Skip the cream cheese swirl and enjoy the brownies with their rich, fudgy texture.
-
Chocolate Red Velvet Brownies: Add ¼ cup semi-sweet chocolate chips for extra chocolate flavor.
-
Raspberry Red Velvet Brownies: Add a few small spoonfuls of raspberry preserves over the cream cheese layer before swirling.
-
Cream Cheese Frosted Brownies: Skip the swirl and spread a smooth cream cheese frosting over the completely cooled brownies.
Helpful Tips
-
Use room-temperature eggs for a smoother brownie batter.
-
Allow the melted butter and white chocolate to cool slightly before mixing them with the eggs.
-
Measure the flour carefully to avoid dry, cakey brownies.
-
Avoid overmixing once the dry ingredients are added.
-
Use gel food coloring if you want a deeper red color without adding extra liquid.
-
Don’t overbake. A few moist crumbs on the toothpick indicate that the brownies are ready.
-
Let the brownies cool completely before slicing to keep the cream cheese swirl neat.
Frequently Asked Questions
Why are my red velvet brownies not fudgy?
Too much flour or overbaking can make brownies dry and cakey. Measure the ingredients accurately and remove them from the oven when the center is just set.
Can I make these brownies without food coloring?
Yes. You can leave out the food coloring, although the brownies will have a natural light brown color rather than the traditional red velvet appearance.
Can I use milk chocolate instead of white chocolate?
White chocolate is recommended because it helps preserve the red color and creates a mild, creamy flavor. Milk chocolate will make the brownies darker and more chocolate-forward.
How do I get clean brownie slices?
Chill the brownies before cutting and use a sharp knife. Wipe the blade clean between each slice for neat edges.
-