
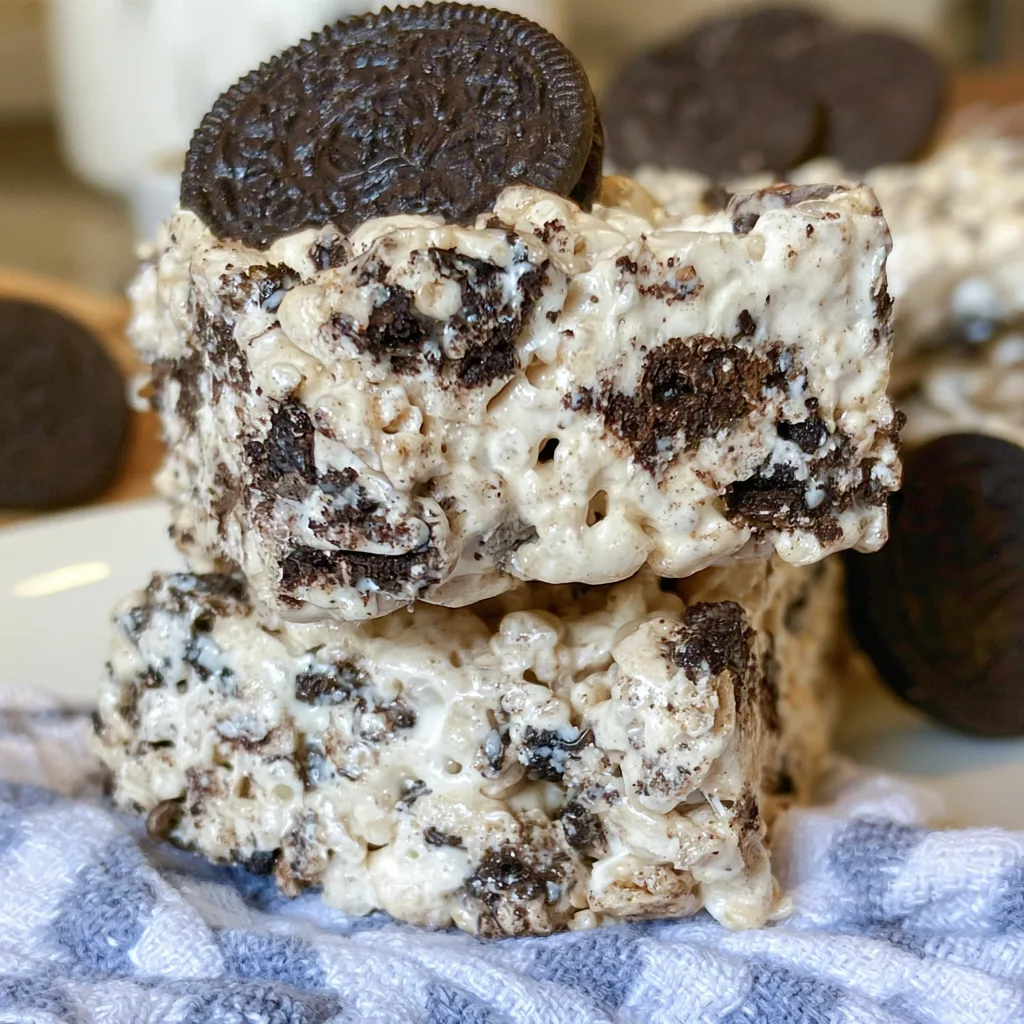
Oreo Krispies are an irresistible no-bake treat that combines crispy rice cereal, crunchy Oreo cookies, gooey marshmallows, and buttery goodness in every bite. They’re soft, chewy, crunchy, and packed with delicious chocolate cookie flavor, making them a perfect dessert for anyone who loves Oreo-inspired treats.
PrintOreo Krispies – Easy No-Bake Cookies and Cream Treats

Make these easy Oreo Krispies with crunchy Oreo cookies, crispy rice cereal, and gooey marshmallows. A delicious no-bake dessert everyone will love!
Ingredients
- 6 cupscrispy rice cereal
- 20Oreo cookies, roughly crushed
- 4 tablespoonsunsalted butter
- 1package (10 ounces) mini marshmallows
- ½ teaspoonvanilla extract
- Pinch of salt
- ½ cupwhite chocolate chips (optional)
- ¼ cupextra crushed Oreos, for topping
Instructions
Prepare the Oreo Mixture
- Roughly crush the Oreo cookies into small pieces, leaving some larger chunks for extra crunch.
- Measure the crispy rice cereal into a large mixing bowl.
- Add the crushed Oreos and gently toss to combine.
Melt the Marshmallows
- In a large saucepan, melt the butter over low heat.
- Add the mini marshmallows and stir continuously until completely melted and smooth.
- Remove from the heat and stir in the vanilla extract and salt.
Combine Everything
- Pour the melted marshmallow mixture over the cereal and Oreo mixture.
- Stir gently with a greased spatula until everything is evenly coated.
- Transfer the mixture to a greased 9 × 13-inch baking pan.
- Lightly press it into an even layer without packing it too tightly.
Add the Topping
- Melt the white chocolate chips in the microwave in 20-second intervals, stirring until smooth.
- Drizzle the melted chocolate over the cereal mixture.
- Sprinkle extra crushed Oreos on top.
Cool and Serve
- Let the treats cool at room temperature for 45–60 minutes until firm.
- Cut into squares with a lightly greased knife.
- Store in an airtight container at room temperature for up to 3 days.
What makes this recipe special is the combination of classic Rice Krispies treats with everyone’s favorite chocolate sandwich cookies. The crushed Oreos add a rich chocolate flavor and a satisfying crunch, while the melted marshmallows create that wonderfully soft and chewy texture. Best of all, you don’t need an oven or complicated ingredients to make them!
You’ll love these Oreo Krispies because they’re quick to prepare, budget-friendly, and perfect for sharing. They’re a fantastic choice for birthday parties, family gatherings, lunchbox treats, or whenever you’re craving something sweet. You can even drizzle melted white chocolate over the top for an extra special finish.
If you’re looking for an easy no-bake dessert that both kids and adults will love, these Oreo Krispies are sure to become a favorite!
Ingredients
These Oreo Krispies require just a handful of simple ingredients to create a deliciously chewy, crunchy, and chocolatey dessert.
Ingredients:
6 cups crispy rice cereal (such as Rice Krispies)
20 Oreo cookies, roughly crushed
4 tablespoons unsalted butter
1 package (10 oz) mini marshmallows
½ teaspoon vanilla extract
¼ teaspoon salt
½ cup white chocolate chips (optional, for topping)
3 extra Oreo cookies, crushed (for decoration)
Ingredient Notes:
Rice Krispies Cereal:Gives these treats their signature crispy and crunchy texture.
Oreo Cookies:Add delicious chocolate cookie pieces and creamy filling throughout the bars.
Mini Marshmallows:Create the soft, gooey texture that holds everything together.
Butter:Adds richness and helps melt the marshmallows smoothly.
Vanilla Extract:Enhances the sweetness and brings out the cookie flavor.
White Chocolate:Makes a delicious decorative drizzle and adds extra sweetness.

Instructions and Preparation
These Oreo Krispies come together quickly with a few simple steps. The key is melting the marshmallows gently to create a soft, gooey mixture that coats every piece of cereal and crushed Oreo.
Prepare the Baking Pan
Lightly grease a 9 × 13-inch baking pan with butter or nonstick cooking spray. You can also line it with parchment paper, leaving a little overhang on the sides to make removing the treats easier.
Crush the Oreo Cookies
Place the Oreo cookies in a large bowl or zip-top bag and roughly crush them into small pieces. Avoid crushing them into fine crumbs because larger cookie pieces add a wonderful crunch and texture.
Melt the Butter and Marshmallows
In a large saucepan, melt the butter over low heat. Add the mini marshmallows and stir continuously until completely melted and smooth. Remove the saucepan from the heat, then stir in the vanilla extract and salt.
Add the Cereal and Oreos
Pour the crispy rice cereal into the melted marshmallow mixture and gently stir until evenly coated. Add the crushed Oreo cookies and fold everything together until the cookies are distributed throughout the mixture.
Transfer to the Pan
Transfer the mixture into the prepared baking pan. Using a lightly buttered spatula or clean hands, gently press it into an even layer. Avoid pressing too firmly, as this can make the treats dense instead of soft and chewy.
Add the Chocolate Topping
If desired, melt the white chocolate chips in the microwave in 20-second intervals, stirring between each interval until smooth. Drizzle the melted chocolate over the top and sprinkle with additional crushed Oreo cookies.
Let Them Set and Slice
Allow the Oreo Krispies to cool at room temperature for about 30–45 minutes, or until firm enough to cut. Lift them out of the pan using the parchment paper and slice into squares.
Enjoy these delicious, chewy, and crunchy Oreo Krispies!
Serving and More
How to Serve Oreo Krispies
Oreo Krispies are best served at room temperature when they’re soft, chewy, and perfectly set. Cut them into squares or rectangles and arrange them on a dessert platter for an easy crowd-pleasing treat.
They pair wonderfully with a cold glass of milk, hot chocolate, or a cup of coffee. For an extra special presentation, drizzle each square with melted white or dark chocolate and sprinkle additional crushed Oreos on top.
These treats are perfect for birthday parties, school celebrations, holiday dessert tables, potlucks, or an afternoon sweet snack.
Storage Instructions
Room Temperature:Store Oreo Krispies in an airtight container for up to 3 days. Keep them in a cool, dry place.
Refrigerator:Refrigeration is not necessary, but you can store them in an airtight container for up to 5 days. Allow them to sit at room temperature before serving for a softer texture.
Freezing:Wrap individual squares in plastic wrap and place them in a freezer-safe container for up to 6 weeks. Thaw at room temperature before enjoying.
Variations and Substitutions
Chocolate Oreo Krispies:Add mini chocolate chips or drizzle melted milk chocolate over the finished treats.
Golden Oreo Krispies:Replace regular Oreos with Golden Oreos for a delicious vanilla cookie version.
Peanut Butter Oreo Krispies:Stir a few tablespoons of creamy peanut butter into the melted marshmallow mixture.
Extra Cookies and Cream:Add white chocolate chips and extra crushed Oreos for an even richer flavor.
Birthday Oreo Krispies:Mix colorful sprinkles into the cereal mixture for a fun party dessert.
Double Chocolate:Use chocolate crispy rice cereal and finish with a dark chocolate drizzle.
Helpful Tips
Melt the marshmallows over low heat to prevent them from becoming hard.
Use fresh marshmallows for the softest and chewiest texture.
Avoid crushing the Oreos too finely; small chunks provide better texture.
Gently press the mixture into the pan instead of compacting it too tightly.
Lightly butter your spatula or hands to prevent sticking.
Allow the treats to cool completely before slicing for clean, even squares.