
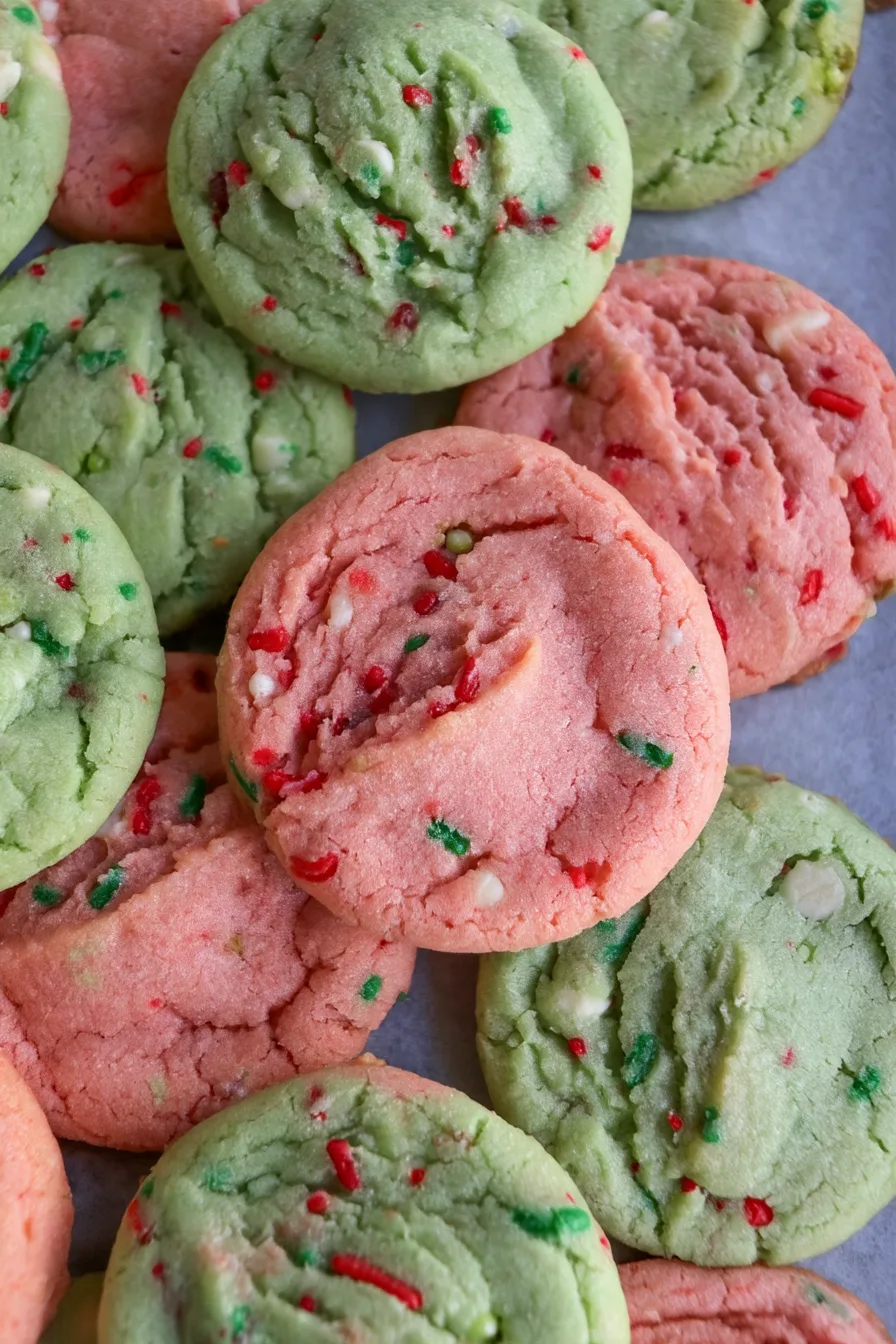
Bring the magic of Christmas baking to your kitchen with these adorable Christmas Pudding Cookies! Inspired by the traditional festive Christmas pudding, these soft, buttery cookies are decorated with rich chocolate, sweet white chocolate, and little red and green details that make them look just like miniature Christmas puddings.
PrintChristmas Pudding Cookies – Easy Festive Holiday Treat

Make these adorable Christmas Pudding Cookies with a buttery cookie base, rich chocolate topping, and festive holly decorations. Perfect for holiday parties and homemade gifts!
Ingredients
For the Cookie Dough
- 1 cup(2sticks) unsalted butter, softened
- ¾ cupbrown sugar, packed
- ¼ cupgranulated sugar
- 2large eggs
- 2 teaspoonsvanilla extract
- 2¾ cupsall-purpose flour
- 1 teaspoonbaking soda
- ½ teaspoonbaking powder
- ½ teaspoonsalt
- 1 teaspoonground cinnamon
- ¼ teaspoonground nutmeg
For the Christmas Mix-Ins
- ¾ cupwhite chocolate chips
- ½ cupsemi-sweet chocolate chips
- ½ cupdried cranberries
- ½ cupchopped red and green candied cherries
- ⅓ cupchopped pecans (optional)
For the Decoration
- ½ cupwhite chocolate chips, melted
- Red and green mini candy pieces or holiday sprinkles
- 2 tablespoonspowdered sugar (optional)
Instructions
Prepare the Cookie Dough
- Preheat the oven to 350°F (175°C). Line two baking sheets with parchment paper.
- In a large mixing bowl, beat the softened butter, brown sugar, and granulated sugar until light and creamy.
- Add the eggs one at a time, mixing well after each addition.
- Stir in the vanilla extract until combined.
Combine the Dry Ingredients
- In a separate bowl, whisk together the flour, baking soda, baking powder, salt, cinnamon, and nutmeg.
- Gradually add the dry ingredients to the butter mixture.
- Mix on low speed just until a soft cookie dough forms. Avoid overmixing.
Add the Christmas Mix-Ins
- Fold in the white chocolate chips, semi-sweet chocolate chips, dried cranberries, candied cherries, and chopped pecans.
- Mix gently until the ingredients are evenly distributed throughout the dough.
- Cover and refrigerate for 30 minutes to help the cookies hold their shape.
Shape the Cookies
- Scoop the dough into balls using approximately 2 tablespoons per cookie.
- Arrange them on the prepared baking sheets, leaving about 2 inches between each cookie.
- Gently flatten the tops if you prefer wider cookies.
Bake the Cookies
- Bake for 10–13 minutes, or until the edges are lightly golden and the centers look slightly soft.
- Remove from the oven and let the cookies rest on the baking sheets for 5 minutes.
- Transfer to a wire rack and allow them to cool completely.
Decorate the Christmas Pudding Cookies
- Melt the white chocolate chips in the microwave in 15-second intervals, stirring between each interval until smooth.
- Drizzle or spoon a little melted white chocolate over each cooled cookie to create a festive topping.
- Decorate with red and green candy pieces or holiday sprinkles.
- Allow the white chocolate to set before serving.
Serve and Enjoy
- Arrange the cookies on a Christmas dessert platter or place them in festive cookie boxes.
- Enjoy these soft, chewy cookies with a cup of hot chocolate, coffee, or warm milk.
Each cookie combines a tender, melt-in-your-mouth base with delicious chocolate flavor and a festive decoration that makes every bite feel special. They’re easy to prepare, fun to decorate, and perfect for adding a little holiday charm to your Christmas dessert table.
The best part is that you don’t need complicated ingredients or advanced decorating skills. With a simple cookie dough and a few easy toppings, you can create beautiful Christmas treats that look impressive without spending hours in the kitchen.
Whether you’re preparing homemade gifts, baking with children, or getting ready for a Christmas party, these Christmas Pudding Cookies are a delicious and festive addition to your holiday celebrations.
Why You’ll Love These Christmas Pudding Cookies
- Adorable Christmas design:Their miniature pudding-inspired appearance makes them especially beautiful for holiday celebrations.
- Soft and buttery texture:Each cookie has a tender center and lightly crisp edges.
- Rich chocolate flavor:Chocolate decorations add sweetness and a delicious contrast to the buttery cookie base.
- Easy to decorate:White chocolate and colorful candy pieces create the classic Christmas pudding look without complicated techniques.
- Perfect for gifting:Arrange them in festive tins or clear gift bags for thoughtful homemade Christmas presents.
- Fun family baking activity:Children can help decorate the cookies with little red and green details.
- Great for holiday parties:They look beautiful on Christmas dessert platters and cookie exchange tables.
What Makes This Recipe Special?
What makes Christmas Pudding Cookies special is their combination of classic homemade cookie flavor and festive decoration.
The cookie base is buttery, soft, and lightly sweet, creating the perfect foundation for the chocolate topping. A layer of melted dark or milk chocolate gives each cookie a rich flavor and creates the traditional dark pudding appearance.
The finishing touch is a drizzle of white chocolate that resembles the creamy icing traditionally served over Christmas pudding. Small red and green candy decorations complete the look, making each cookie resemble a tiny festive dessert.
Unlike traditional Christmas pudding, these cookies are simple to prepare, easy to serve, and convenient to share. They bring the same holiday-inspired appearance in a fun, bite-sized treat.
Helpful Tips for the Best Results
- Use softened butter:Room-temperature butter blends more easily with sugar and creates a smooth cookie dough.
- Measure the flour carefully:Too much flour can make the cookies dry and crumbly.
- Avoid overmixing:Mix just until the ingredients are combined to maintain a tender texture.
- Make evenly sized cookies:Similar-sized dough portions help the cookies bake evenly.
- Don’t overbake:Remove the cookies when the edges are lightly set to keep the centers soft.
- Let the cookies cool completely:Warm cookies can cause the chocolate decorations to melt or slide.
- Melt chocolate gently:Use short microwave intervals, stirring between each one, to prevent burning.
- Decorate with care:Add the white chocolate and red and green decorations while the chocolate topping is still slightly soft so everything stays in place.
When to Serve Christmas Pudding Cookies
These festive cookies are perfect for almost every Christmas occasion.
- Christmas dessert tables:Arrange them with gingerbread cookies, sugar cookies, and chocolate treats.
- Holiday cookie exchanges:Their unique pudding-inspired appearance makes them stand out among traditional cookies.
- Homemade Christmas gifts:Package them in decorative tins or clear bags tied with festive ribbons.
- Family baking days:Let everyone help decorate the cookies and create their own little Christmas puddings.
- Christmas parties:Serve them alongside hot chocolate, coffee, or tea.
- Holiday movie nights:Enjoy a plate of these sweet treats while watching your favorite Christmas movies.
These Christmas Pudding Cookies are a fun and delicious way to celebrate the holiday season. With their buttery texture, chocolate topping, and adorable festive decorations, they’re sure to bring smiles to your Christmas table.
Ingredients
These Christmas Pudding Cookies are made with a simple buttery cookie dough and decorated with melted chocolate, white chocolate, and festive candy details. The ingredients are easy to find, and the decorating process is simple enough for the whole family to enjoy.
Ingredients You’ll Need
For the Cookies:
- 2 ¼ cups (280 g) all-purpose flour
- ½ teaspoon baking powder
- ¼ teaspoon salt
- ¾ cup (170 g) unsalted butter, softened
- ¾ cup (150 g) granulated sugar
- 1 large egg
- 2 teaspoons vanilla extract
- 1 tablespoon milk, if needed
For the Decoration:
- ¾ cup (130 g) milk or dark chocolate chips
- ½ cup (85 g) white chocolate chips
- 24 small red candy pieces or red decorating candies
- 48 small green candy pieces or green decorating candies
Ingredient Notes and Substitutions
All-purpose flour:Provides structure and helps the cookies hold their shape. Measure it carefully to avoid making the dough too dry.
Unsalted butter:Gives the cookies their rich, buttery flavor and tender texture. Make sure it is softened but not melted.
Granulated sugar:Adds sweetness and helps create lightly crisp edges.
Egg:Binds the ingredients together and gives the cookies a soft, tender texture.
Vanilla extract:Adds a warm, sweet aroma that complements the buttery cookie base. You can also use almond extract for a different flavor.
Baking powder:Helps the cookies rise slightly while maintaining their shape.
Milk chocolate or dark chocolate:Creates the dark pudding-inspired topping. Milk chocolate gives a sweeter flavor, while dark chocolate adds a richer taste.
White chocolate:Used to create the traditional icing-like decoration on top of each cookie. Melt it gently for a smooth finish.
Red and green candies:Small candy pieces create the appearance of festive holly berries and leaves. You can also use red and green decorating sprinkles.
Equipment You’ll Need
- Large mixing bowl
- Medium mixing bowl
- Electric hand mixer or stand mixer
- Whisk
- Rubber spatula
- Measuring cups and spoons
- Baking sheets
- Parchment paper
- Small microwave-safe bowls
- Piping bag or small zip-top bag
- Wire cooling rack
Before You Begin
- Preheat your oven to350°F (175°C).
- Line two baking sheets with parchment paper.
- Remove the butter and egg from the refrigerator so they can reach room temperature.
- Measure all the ingredients before starting.
- Prepare the red and green candy decorations.
- Place the chocolate and white chocolate in separate microwave-safe bowls.
- Make sure you have enough space for the cookies to cool completely before decorating them.
Preparation and Baking Time
- Prep Time:20 minutes
- Chilling Time:30 minutes
- Baking Time:9–11 minutes
- Decorating Time:20 minutes
- Total Time:Approximately 1 hour and 20 minutes
- Servings:24 cookies

Step-by-Step Instructions
Prepare the Cookie Dough
In a medium bowl, whisk together the all-purpose flour, baking powder, and salt. Set aside.
In a large mixing bowl, beat the softened butter and granulated sugar until light and creamy. Add the egg and vanilla extract, then mix until everything is well combined.
Gradually add the dry ingredients to the butter mixture. Mix on low speed until a soft dough forms. If the dough feels too dry, add a little milk, one teaspoon at a time.
Chill the Dough
Cover the cookie dough and refrigerate for about 30 minutes. Chilling helps the dough become easier to handle and prevents the cookies from spreading too much during baking.
Shape the Cookies
Scoop the chilled dough into small, equal portions, approximately one tablespoon each. Roll each portion into a ball and place it on the prepared baking sheets, leaving enough space between the cookies.
Gently flatten each ball with your fingers or the bottom of a glass to create a slightly rounded cookie shape.
Bake the Cookies
Bake in the preheated oven at350°F (175°C) for 9–11 minutes, or until the edges are lightly golden and the centers look set.
Avoid overbaking because the cookies will continue to firm up as they cool.
Remove the baking sheets from the oven and let the cookies rest for a few minutes before transferring them to a wire rack. Allow them to cool completely before decorating.
Melt the Chocolate
Place the milk or dark chocolate chips in a microwave-safe bowl. Microwave in 20-second intervals, stirring between each interval until completely smooth.
Repeat the process with the white chocolate in a separate bowl.
If the white chocolate becomes too thick, stir gently until smooth. Avoid overheating it, as white chocolate can burn easily.
Add the Chocolate Topping
Spoon a small amount of melted milk or dark chocolate onto the top of each cooled cookie. Spread it gently toward the edges, leaving a slightly rounded, pudding-like appearance.
Let the chocolate sit for a few minutes until it begins to set but is still slightly soft.
Create the White Chocolate Icing
Transfer the melted white chocolate into a small piping bag or zip-top bag. Snip off a tiny corner and drizzle a little white chocolate along the upper edge of each cookie.
Allow some of the white chocolate to drip naturally down the sides to resemble traditional Christmas pudding icing.
Add the Festive Decorations
While the white chocolate is still soft, place small red candy pieces and green decorations on top of each cookie to create a little holly design.
Gently press the decorations into the chocolate so they stay in place.
Let the Cookies Set
Place the decorated cookies on a flat surface and allow the chocolate to harden completely at room temperature. If you’re short on time, refrigerate them for about 10–15 minutes.
Once the decorations are firm, your Christmas Pudding Cookies are ready to serve!
Helpful Baking Tips
- Use room-temperature ingredients:Softened butter and a room-temperature egg help create a smooth, evenly mixed dough.
- Chill the dough:This makes shaping easier and helps the cookies maintain their shape.
- Keep the cookies similar in size:Even portions help them bake at the same rate.
- Let the cookies cool completely:Decorating warm cookies can cause the chocolate to melt and slide off.
- Melt chocolate slowly:Short microwave intervals help prevent burning and keep the chocolate smooth.
- Decorate while the chocolate is soft:Add the red and green candies before the white chocolate sets so they stick properly.
Serving Suggestions
Christmas Pudding Cookies are perfect for adding a festive touch to your holiday dessert table. Their chocolate topping and cute holly decorations make them beautiful enough to serve at Christmas parties or give as homemade gifts.
Here are a few delicious ways to enjoy them:
- With hot chocolate:Serve them with a warm cup of hot chocolate for a cozy Christmas treat.
- With coffee or tea:Their buttery texture pairs wonderfully with your favorite warm drink.
- On a Christmas dessert platter:Arrange them alongside gingerbread cookies, sugar cookies, and brownies.
- As homemade gifts:Place the cookies in decorative tins or clear treat bags tied with festive ribbons.
- For holiday parties:Add them to your Christmas buffet for a sweet and charming dessert.
Storage Instructions
At Room Temperature:Store the cookies in an airtight container at room temperature for up to 5 days. Keep them in a cool, dry place away from direct sunlight or heat.
In the Refrigerator:If your kitchen is warm, you can refrigerate the decorated cookies in an airtight container for up to 7 days. Allow them to sit at room temperature briefly before serving for the best texture.
In the Freezer:Freeze the undecorated cookies in a freezer-safe container for up to 2 months. Place parchment paper between layers to prevent sticking. Thaw at room temperature, then decorate with melted chocolate and festive candies.
Delicious Variations
White Chocolate Christmas Pudding Cookies:Use white chocolate for the main topping and add a little melted dark chocolate drizzle for contrast.
Dark Chocolate Version:Choose dark chocolate for a richer, less sweet topping that balances the buttery cookie base.
Peppermint Christmas Cookies:Add a small amount of peppermint extract to the cookie dough for a refreshing holiday flavor.
Almond Christmas Pudding Cookies:Replace the vanilla extract with almond extract for a delicate nutty aroma.
Festive Sprinkle Cookies:Instead of candy pieces, decorate the cookies with red, green, and white Christmas sprinkles.
Mini Christmas Pudding Cookies:Make smaller dough balls to create bite-sized cookies that are perfect for holiday dessert platters.
Frequently Asked Questions
Can I make Christmas Pudding Cookies ahead of time?
Yes! You can bake the cookies a day or two before serving and store them in an airtight container. For the freshest appearance, decorate them once they have cooled completely.
Why do my cookies spread too much?
Cookies may spread if the butter is too soft or melted, or if the dough has not been chilled long enough. Refrigerating the dough for about 30 minutes helps the cookies maintain their shape.
Can I use store-bought cookie dough?
Yes. Plain sugar cookie dough can be a convenient shortcut. Bake according to the package instructions, allow the cookies to cool, and decorate them with chocolate and festive candies.
How do I keep the chocolate topping smooth?
Melt the chocolate slowly in short microwave intervals, stirring frequently. Avoid adding water, as even a small amount can cause melted chocolate to become thick and grainy.
Can children help decorate these cookies?
Absolutely! Children can help add the red and green candies and create the little holly decorations. Just let an adult handle the hot baking trays and melted chocolate.
Can I freeze Christmas Pudding Cookies?
Yes. For the best results, freeze the undecorated cookies and add the chocolate decorations after thawing. This helps preserve their appearance and texture.
How do I know when the cookies are done baking?
The edges should look lightly golden, while the centers should appear set but still soft. They will become firmer as they cool, so avoid leaving them in the oven until they look completely hard.
Final Thoughts
These Christmas Pudding Cookies are a simple and festive way to bring a little extra sweetness to the holiday season. With their buttery cookie base, rich chocolate topping, and adorable red and green decorations, they look just like miniature Christmas puddings.
Whether you’re preparing a holiday cookie platter, baking with your family, or making homemade edible gifts, these cookies are sure to add a special touch to your Christmas celebrations.